Non-Places: Day Five and Critical Reflection

Non-Places: Day Five and Critical Reflection

This was the last week of the graphic design project, and I got to finish it!

I printed off the book jacket at the correct scale. (Side note: with every single Mac refusing to print my InDesign document in any format, it took me over an hour to get this single thing done. Macs exhaust me and I don’t care for them.)

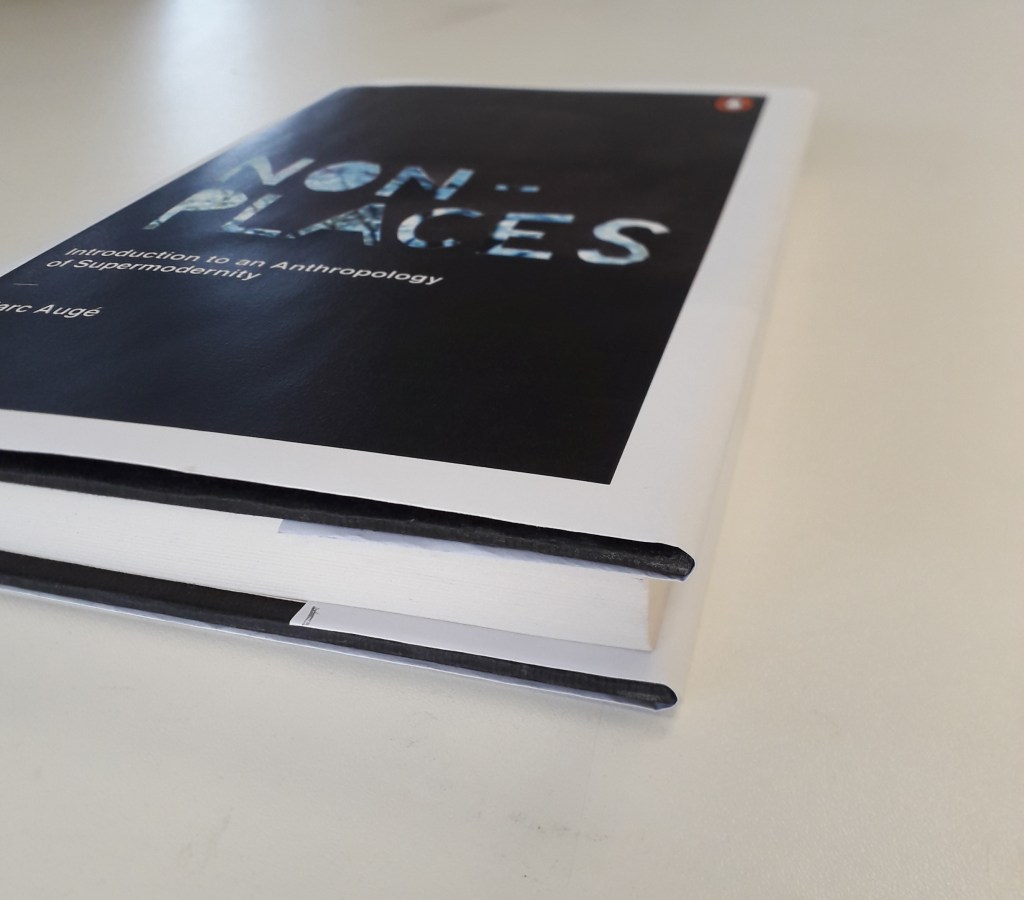
I measured and wrapped it round the book, to provide photographic evidence of it in an applied situation for my final worksheet.

What do I think went well with this project?

I am happy with the overall look of the book. The image for the front cover, touched up in PhotoShop, was very successful. I’m glad I went for the cooler colour scheme in the end because I feel it communicates the concept of “non-places” better: cold, connoting isolation, loneliness and a lack of emotion. I suppose the fact that the trees are bare against a cold sky is appropriate as it shows a place where life can’t be sustained, just as Auge states that life can’t be sustained in non-places.

What do I think didn’t go well?

I feel like despite all of the time that went into it, this final cover looks a little primitive. This might be because of the white edges: although I made that decision carefully in relation to Penguin’s brand identity, the block photographs on white coming out of a normal printer made it look a little thrown-together. To solve this problem, the cover being printed on glossy paper may have given it the professional look it needs.

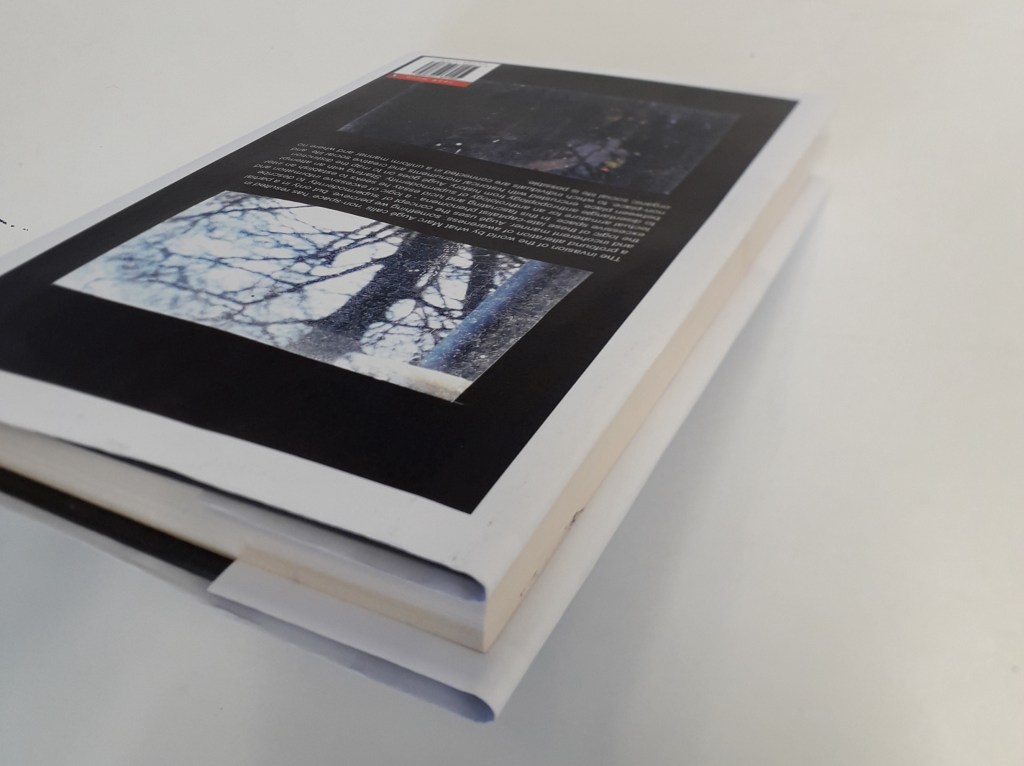
In addition, I feel like the positioning of the blurb in relation to the image looks a little unfinished. It’s legible and the front and back cover images tie in together, but just as a block of text it sits strangely against the black paper cutout. If I’d had more time, I could have experimented both with the text and the back cover image entirely.

How did I develop my ideas and how could I have developed them differently?

After a session so heavily focused on hand-lettering, I felt almost pushed to create something that was centred on the lettering. That’s the main reason why my research and experimentation drew me towards the stencil-cut type.

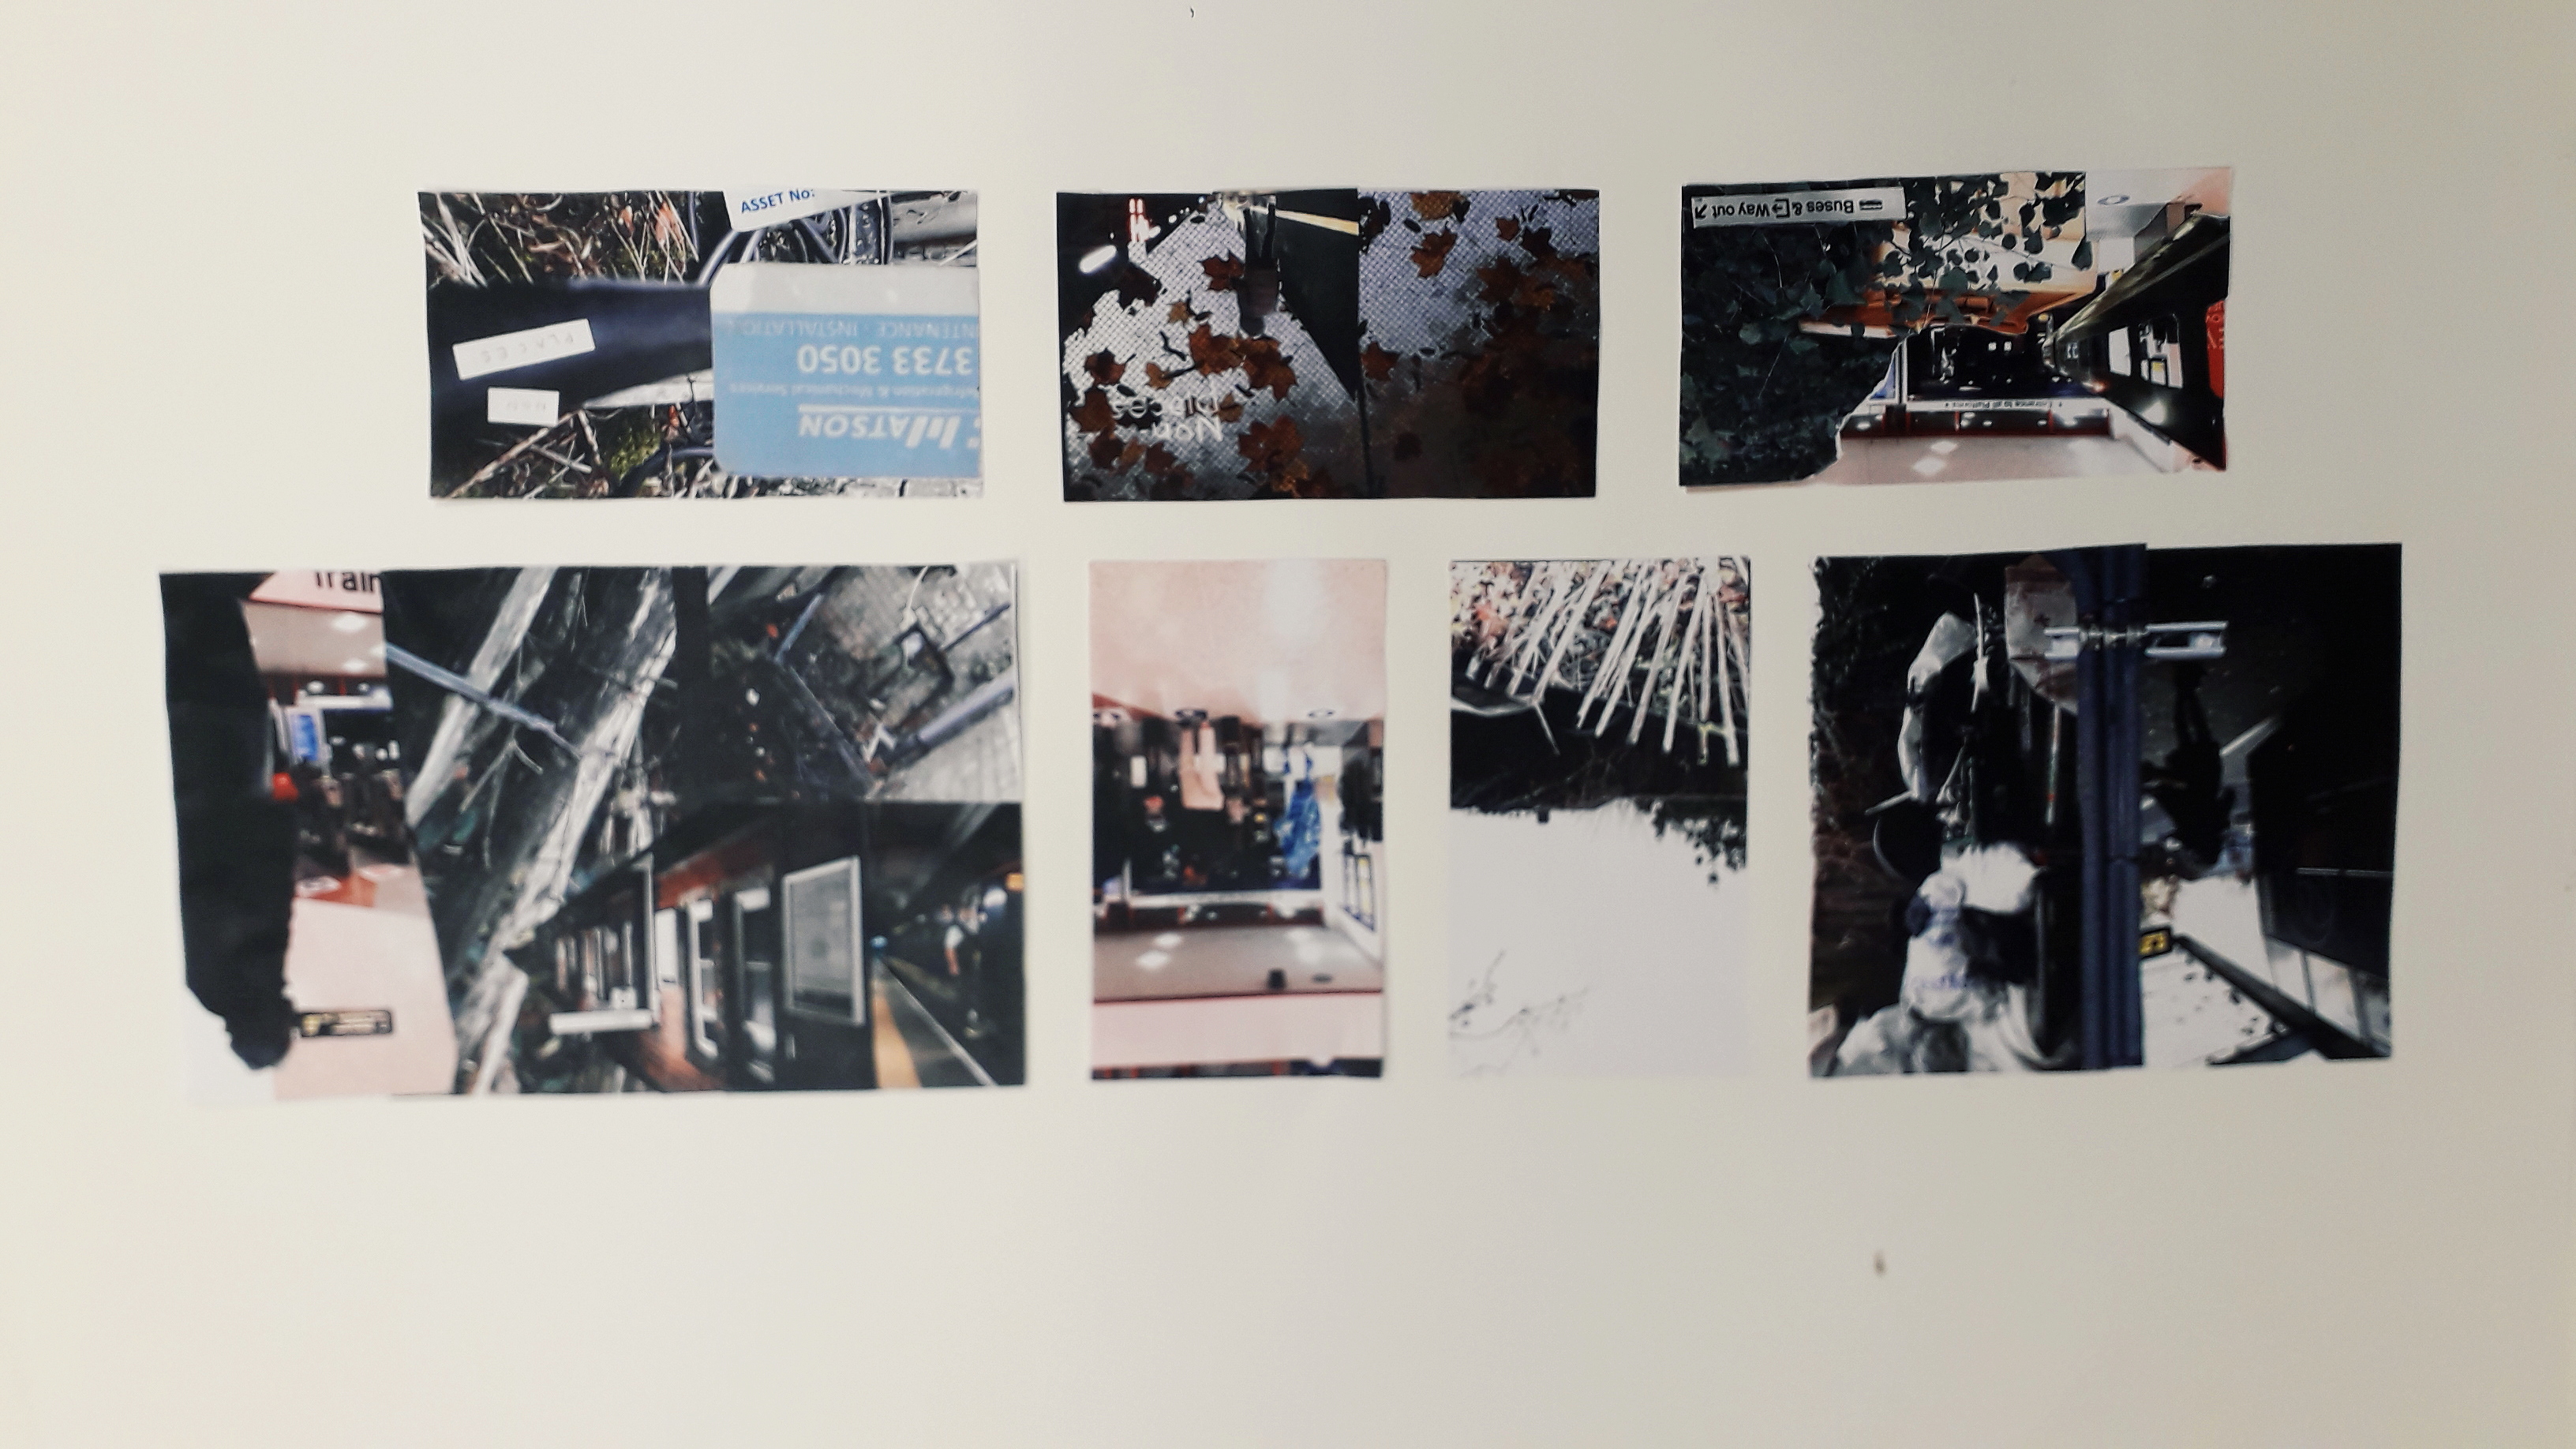
I would have liked to have experimented a little further with my collage ideas, maybe: the images I had collated were all quite interesting and it seems a shame my process meant they didn’t make it into the final piece.

Were the media and techniques I explored successful?

I think a downfall with my collage pieces was that I tried to recreate them on PhotoShop from the start. It just doesn’t have the same feeling as the truly torn and cut work I had on one of my worksheets. A limitation of working with collage at any kind of scale is that I literally don’t have the money to be printing sheets and sheets of coloured images to experiment with – as much as I’d like to. This meant that my collage work was quite small, which would have been difficult to scale up at any sort of quality.

A way to solve this problem might have been working digitally from the start (so as not to lose anything in translation between traditional and digital). Alternatively, I could have created a series of pencil thumbnails with possible collage ideas and compositions on them, so when I did come to printing and collaging I had something in mind. This does take away from the freeform experimental approach, though.

Hey, maybe I could have printed off all of the work and cut it up but just photographed compositions I liked rather than sticking them down. That would mean I could still play around a lot, but would mean I could reuse images I liked rather than having to print a ton of duplicates.

Non-Places: Day Four

Non-Places: Day Four

On Monday, it was the fourth day of the graphic design project. I realised that I was quite behind in terms of producing hand-lettering or typography work, despite my sheet full of artist research.

To respond to the brief, I created a stencil out of which I cut the title “NON-PLACES”, and held it up against potential relevant backgrounds.

This is an example of an unedited picture with the stencil.

A problem the stencil presented me with was that the glue used to stick it to the cardboard backing wrinkled the paper quite severely. To solve this problem, I later edited the images with the clone stamp tool in Photoshop. (After taking a tutorial on it!)

I then adjusted the images I liked the most a little in different experimental ways before placing them into InDesign and fitting them as jacket covers.

This is a saturated and posterised version of the stencil. I placed it as the cover, then colour-picked the background and repeated the design at lower opacity on the back cover and inside flaps.

I really liked this design, but I feel it falls a little short on the overall atmosphere of non-places. The warm browns and reds almost feel like a cosy fireplace, whereas the colour scheme of non-places would be less saturated and cooler in tone. That’s why this was a useful, yet not final, draft.

I preferred this cover in terms of actually meeting the brief. The dusty window and grey-heavy colour palette give off quite a sad, isolated feeling. It distances the viewer from reality by placing the reader behind a literal window.

Was this research useful? Yes! After a day’s worth experimenting heavily with the stencil, I feel quite confident that it will feature on my final draft (whichever I choose it to be at the end). I feel like the sudden inspiration to work with hand-cut lettering came from reading Hand Job, a catalog of hand lettering I took out of the library. The introduction of the book highlighted the importance of unique lettering, and this use of paper stencil gives a really interesting, handmade feeling to the type.

Where will I take this now? The project comes to an end next Monday. If the printers decide to come back into action (god, please… I have so much work I can’t even do right now because the whole printing system is down…), I will print off the final design at the correct size. I will photograph it around the book and create a final presentation sheet to show the culmination of the process in the final result.

Letterpress Workshop Reflective

Letterpress Workshop Reflective

I signed onto the letterpress workshop with Ruth today. It was really interesting, especially seeing it alongside reading Type & Typography so I could place it historically into context.

We worked with a Galley Press (I think that’s what it was called!). This involved setting type into a metal tray using “furniture”, which includes all the pieces of metal like leading used to space and hold type in place. The type we worked with today was wooden blocks.

This is an example of how you’d set the type. The metal to the far left of the picture is actually a strong magnet that held the word “writing” in place. Ideally, I’d have used more magnets in setting the type but Ruth only had 8 in the whole studio… and there were 8 students.
This is an experimental piece. When these have dried, I’ll stick the white paper onto the off-white back sheet with “RAVEN” printed on it.
This is printing and shadow printing (printing again, offset, without re-inking) onto a scrap piece of paper full of mechanical diagrams. I like this a lot for how busy it is.

How was the workshop useful? I took letterpress because I was so interested in it and have been for years; I hope to be able to use it in personal projects or when my art brief becomes appropriate. I have to book in with Ruth a couple of days in advance if I plan to be in the printing room – but I’m just so glad I have the resource available now.

I also learned a lot about the practicalities of letterpress printing with this method. I know how to clean my hands correctly to remove the oil paint (that is, rub vegetable oil in followed by a gritty soap paste by the sink). I also know why letterpress requires oil-based type, and is one of the only printing forms that has not been replaced by water-based ink. (It’s because water would interfere with the wooden type, and would print slightly less well.)

Where am I going to take this? I can’t say I have any practical ideas in my head right now, except maybe for typesetting a poem or something smaller scale as experimentation. I’ll stick some of my experimentation into my sketchbook, and maybe mount the rest onto a complete worksheet. When the right brief comes along, I’ll definitely book in again!

Type & Typography Notes

Type & Typography Notes

I’ve been reading Type & Typography by Phil Baines and Andrew Haslam for about a week now. It’s dense, but already I think it’s changing the way I look at typography.

I can’t remember or make notes on everything I’ve read, so I’ll just include a couple of highlights (if anything to prove I’ve actually read the book!).

“Lexicographers record these patterns of change, continually collecting words, cataloguing them and preserving them in dictionaries, glossaries and thesauruses.”

“If writing were architecture, then books would be buildings, pages floors, paragraphs rooms, sentences walls, words furniture, letterforms bricks, phonemes clay and grammar mortar.”

In reference to Grammar

I learned that the origin of the idiom “a square meal” is actually from the Navy, where for some reason they had square plates.

I also learned that the Phoenicians were one of the very first cultures to create an alphabet, and that theirs had 22 letters. E.g. “Aleph”, meaning Ox, was similar to a small pictogram of a bull with horns.

The Greeks took many of the Phoenicians’ letters and changed them to suit their own culture. Aleph was flipped so the “horns” of the ox faced downwards, and was renamed “Alpha” – or, of course, “A”. It really interested me that the evolution of language is that traceable!

I’ve learned about the evolution of printing from its very origin in the fifteenth Century when the fist type was printed. I’ve also learned of many examples where the circumstances dictate the style and source of certain typefaces. For example, “Broken Script” or Textura (you might know it as Gothic), was amongst the first typefaces to be printed but in order to be accepted as an invention it closely mimicked handwriting at the time.

Many typefaces, in fact, mimic handwriting either implicitly or explicitly. E.g. Copperplate fonts mimic brushstrokes made by a calligrapher’s pen.

The move from metal cut letterpress printing and typesetting to Phototypesetters was revolutionary, and then again to typewriters. Each new invention speeds up – and reduces the cost of – reproducing type for mass production.

“The Intertype Fotosetter was the first Photosetting machine to prove its worth in a commercial environment.”
Non-Places: Day Two

Non-Places: Day Two

Yesterday was the second taught day of our graphics project.

The morning consisted of printing off our pictures and collaging them into potential abstract book cover designs. As (and hopefully WHEN) I make it into university today, I’ll take and attach a photo of the worksheet I created full of collaged designs.

In the afternoon, we had a photoshop tutorial with Neil. I’m not going to lie, the fact that I didn’t have a mac to work on because the class sizes aren’t correctly managed did make me angry. I had about an hour at the end of the day to get my practical work done, though, and I’m really pleased with what came of it!

What was successful about the day? I would say that, after a lot of moping, my morning collages came out really well. I’ll be using them as inspiration in my photoshop endeavours. It was Danny, continually encouraging us to be quick and not to think too hard, that allowed me to create the work I did. He kept saying “it’s an instinctive exercise, not an intellectual one.” After about the fifth time, I was coming up on exasperation because I do everything the intellectual way. But he was right, of course.

I also think that in my limited time (and incredibly limited temper), creating the book jacket draft that I did was impressive. I had to create the word “PLACES” in Photoshop with the pink branches as a clipping mask, then import it into InDesign and flip it.

Interestingly, my reading the book Type and Typography has actually influenced the way I’m thinking about type.

What still needs to be done? I need to go in for a little while longer and spend some time mocking up other drafts of book jackets. I’d also quite like to write a blog on what I’ve been learning in Type and Typography.

Non-Places: Day 1

Non-Places: Day 1

On Monday this week, I had my first day of the three-day graphic design project. The brief is to create a book jacket for Marc Auge’s Non Places: An Introduction to the Anthropology of Supermodernity.

The day was split in two: the first, a briefing and Adobe InDesign workshop with Neil. The second was pretty self-directed; finding photos and doing research for the book jacket.

This is a screengrab from the end of the InDesign walkthrough. We have a template of the correct measurements for the jacket, complete with the logos and text the brief requires. Now we can play with it without worrying!

I also got a few photos inspired by Non-Places. I’ll include a couple of them.

This is the top of a bus shelter, although it might not be perfect because the viewer needs to KNOW what it is in order to create a coherent mental image of the term “non-places”.

Was the day purposeful? Yes! Having missed my InDesign induction workshop with Neil the first time, I really needed the tutoring. There were lots of little things I learned about creating guidelines and layers, etc. I have a working note on my phone with interesting advice I’ve been given about using InDesign.

Were the media and techniques I used successful? Why or why not? The photograph collecting is all done on my phone. It’s quite high quality, but I know it could be improved by booking out a serious camera and getting to grips with it, e.g. aperture, focus, etc. Otherwise, I’ve been taking photos when I see relevant places. I try and get landscape and portrait versions, on the off-chance that I might like one enough to do a complete wraparound of the jacket.

Where am I going to take it? Outside of class, I have assigned work to do. Apart from collecting more photos, I have to compile them together in a document and ensure they’re printed out for the next workshop. I might also experiment with colour digitally on a few of the images, see what I like and don’t like. Research-wise, I’ve checked out a ton of the recommended reading from the library… but I’ve already blogged about that, so you’ll know!

Non-Places Research: Artists: Andrzej Klimowski

Non-Places Research: Artists: Andrzej Klimowski

Klimowski’s parents were Polish emigres. Klimowski studied at St. Martin’s School of Art, but unexpectedly returned to Poland in 1973-80. “There he specialised in poster design and made films in a political climate where graphic communication was not merely oil for the wheels of capitalism, but a way of maintaining hope of a better future than Communism could provide.”

He had success creating book jackets for writer Milan Kundera, whose work was supporessed after the Russian invasion of Czechoslovakia in 1968. His collages are surreally inspired, often featuring bodies with the head obscured. This has relevance to the suppression of intelligence under an oppressive regime.

A quick google search on this book suggests that the Author set out to make the point that neither love nor art offer an escape from political background and conflict. The burning fire might suggest the intrusion of politics into the love stories within the book.
I like the inclusion of both photography and enlarged sections of engravings here. I’d like to make some sort of surrealist-inspired work, and this jacket really appeals to me. The starkest tonal difference is in the hand holding the puppet-strings, and therefore draws the eye there. The composition is balanced, with darkest patches in the upper left and lower right.

How is this relevant to my current practice? The graphic design brief specifies that our book jacket will be a photographic collage, and Klimowski’s works are just that. They have a “cut-and stick” feel to them that corresponds to the workshop’s activity of physically creating a collage.

Source:

Powers, A. (2001) Front Cover – Great Cover and Book Jacket Design, Mitchell Beazley, UK.

Wow. Yikes.

Wow. Yikes.

So I’m heading up to Cardiff tomorrow as an intermediary point between here and Crete (joining my dad and his girlfriend Rachael before we all embark to the airport together the following day). I’m mentioning this because it means that I won’t get a chance to do art for over a week bar the small en-plain-air paintings I managed in France. I certainly won’t be able to get any more work done on the survival kit project.

This prompted a frantic stint on my sketchbook tonight, resulting in a page I’m really proud of.

Wow . Yikes .

The graphic design-esque nature of the two words was created pretty much on a whim, with a very vague yet different final product in mind. The feeling of confusion and sickliness comes through exactly as I’d hoped it to, though, and I count this as a massive success.

The lino cut prints were ones I created during my A Levels… but since my survival kit is themed heavily around anxiety about surviving independent life and how one is perceived to be surviving, I thought the eyes surrounding and blocking the faceless figure was only appropriate. I have a cut I’ve done in my leisure of a converse shoe I plan to use in later experiments.

One of my anxieties is whether I will make another actual lino cut I’m equally proud of soon. I’d like to try and make another complex piece like this one, perhaps similar with unsettling themes and eyes.

In other news, my blank white backpack arrived in the post! This is my container for the survival kit. I don’t have the time or resources to make a bag I’ll be happy with from scratch so I bought a blank white backpack to paint and embroider to my wee heart’s content!

It’s huge. I have a few ideas, though.